


Visual Studio 2022 x Github - Two superheros finally best friends
Visual Studio git integration


I first started using Visual Studio during my studies in 2016. Back then VS 2017 was the current version and since then a lot has changed. One of the greatest features that has been emerging during the last couple of years is the integration of git/github. Yes I know git is not the same as github but for me they always go in conjunction with each other. #NoGitWithoutTheHub
During the lifecycle of Visual Studio 2019 the git-integration was introduced and has been continuously updated. Each update brought some new functionalities to integrate git into Visual Studio. Today we got Visual Studio 2022 with a git Integration that I never want to miss again.
So in this quick tutorial I will guide you through the steps to set up your enviroment with Visual Studio and github. If you find any mistake or things I forgot to mention along the way, please reach out or leave a comment down below.
1. Install git
To install git just head over to the official git-website and download the latest version for your machine. In my case it's version 2.35.1 for windows .
The installation itself is a pretty straight forward process just double check the follwoing steps. In the fourth step you're asked wich code-editor you would like to use. Just pick the one your're most comfortable with. You'll harldy have to use the code-editor for git files anyways.
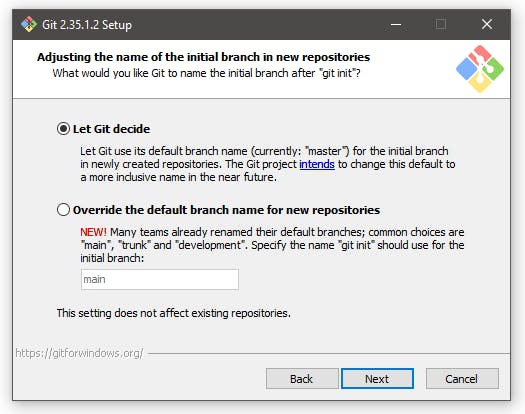
Next you can setup a custom name for the "master" branch but for me the good old "master" is alright.
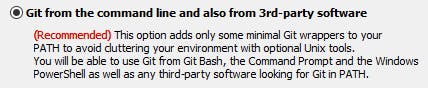
In the following step make sure that the option "Git form the command line and also from 3rd-party software" is checked, so Visual Studio will be able to use git.
For the rest of the steps just keep the default settings and finish the installation.
To Confirm the installation just open up git bash or a commandline and check
the installed version by typing
git --version
This should show your currently installed version of git.
2. Register on GitHub
For this step just quickly head over to GitHub and sign up. The developers over there set up a registration process that is even fun to go through. Just complete the whole process and check that you're able to log in to your newly created github account before you proceed.
3. Install Visual Studio 2022
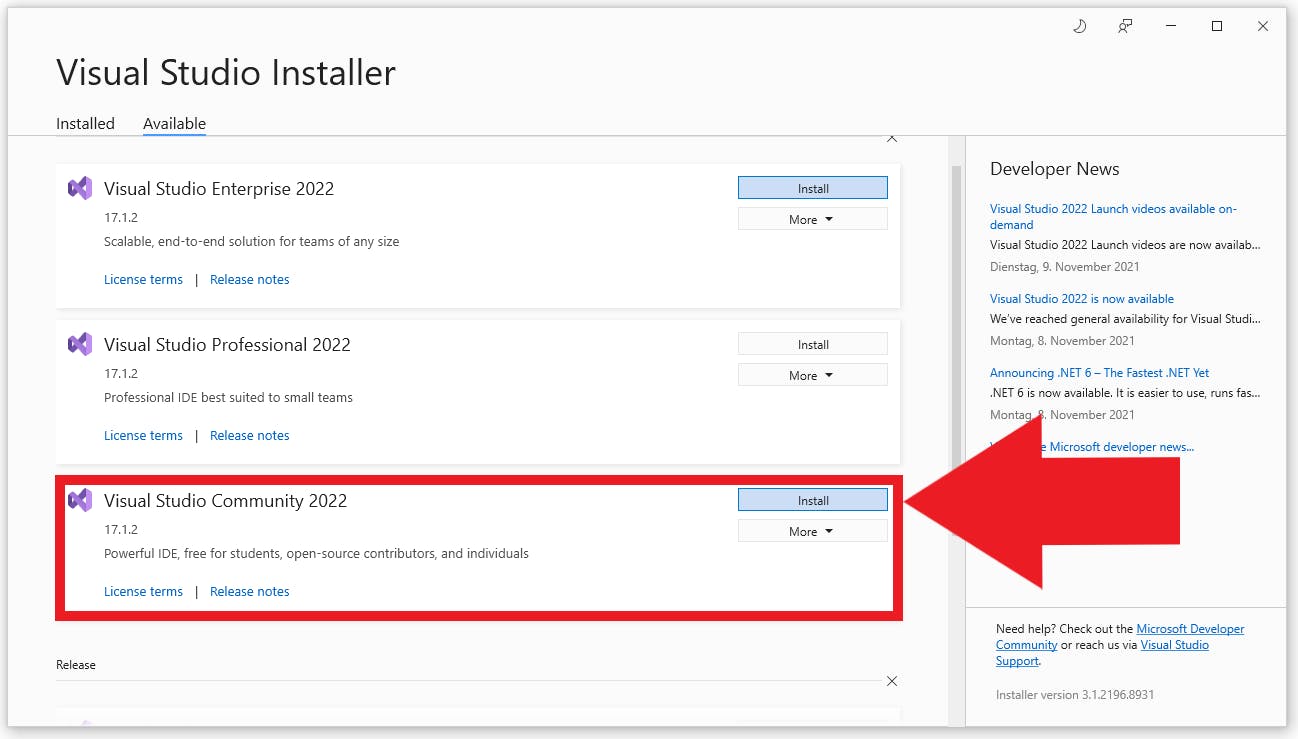
In this third step we will install Visual Studio 2022 , which is Microsoft's main and most powerful IDE/code-editor. As an individual you have the option to download the free Community 2022 version from the official microsoft-website. Normally the Visual Studio installer will directly head to the installation of VS 2022 if this is not the case just open up the installer manually an pick "Visual Studio 2022 Community" from the available options.
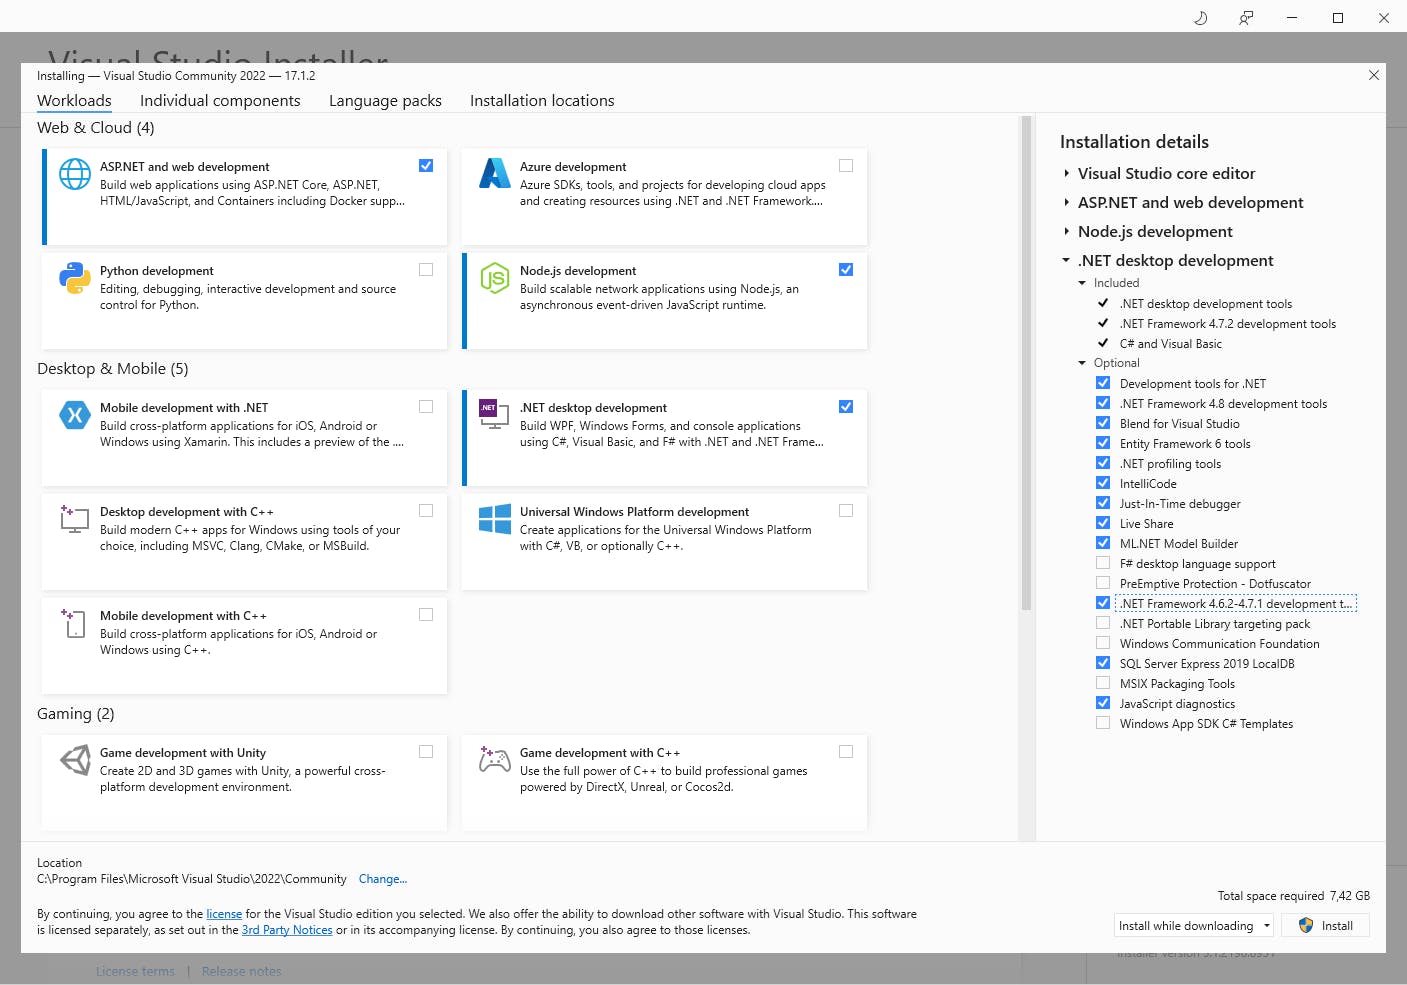
Next choose the workloads you need for your development purpose. In my case I want to be able to develop desktop and web-applications, so I'll go with ASP.NET, Node.js and .NET desktop. But no worries you can always retunr to the VS Installer and install all the other options later on.
At this point a quick hint for all the fellow developers still developing in .net framework. If you still want the ability to create older .net framework project types you have to make sure that the checkbox at ".NET Framework 4.6.2-4.7.1" on the optional tab is checked.
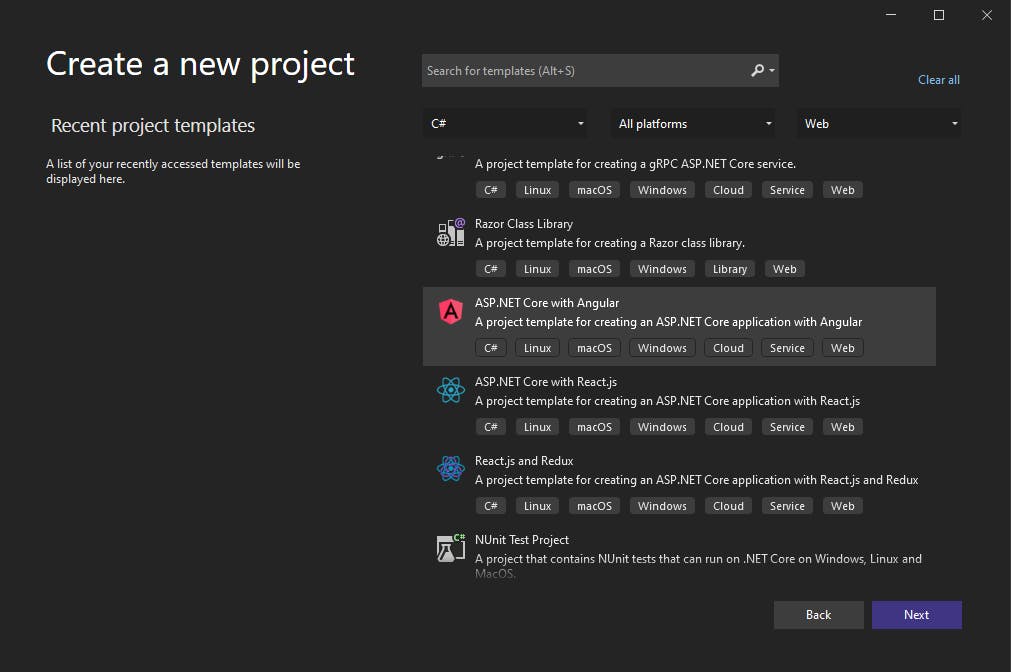
With Visual Studio installed successfully go ahead and create a new project. For demo purpose I'll create a new ASP.NET Core with Angular project under my default repository path.
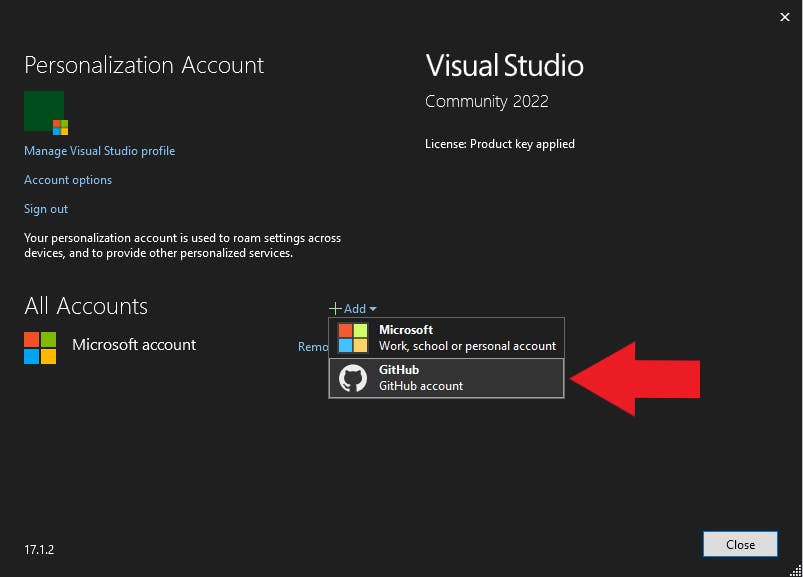
4. Set up github in Visual Studio
On the top menu-bar select "File" -> "Account Settings" and click on "+Add" to add a GitHub Account.
This will open up a web-browser and asks you to log in to your GitHub account. After providing your credentials you should see a acknowledge-screen like this:
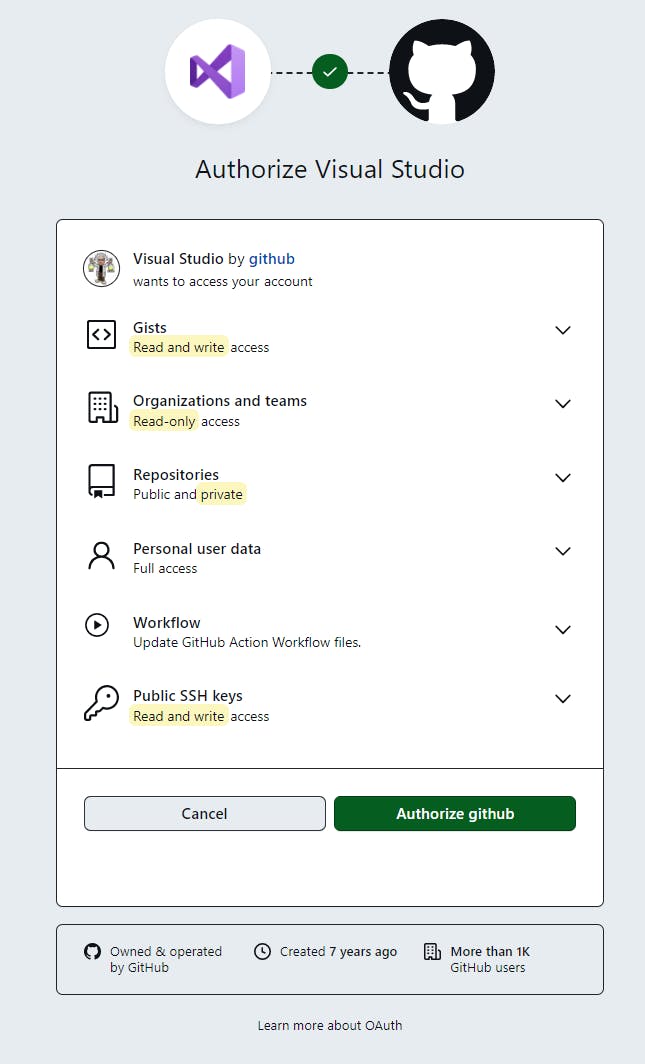
Just hit that "Authorize github"- Button and wait till the browser tells you to return to Visual Studio.
5. Create the repository and push to github
Back in Visual Studio go to the "Git" menu on the top menu-bar and select "create git repository" to open up the following dialog.
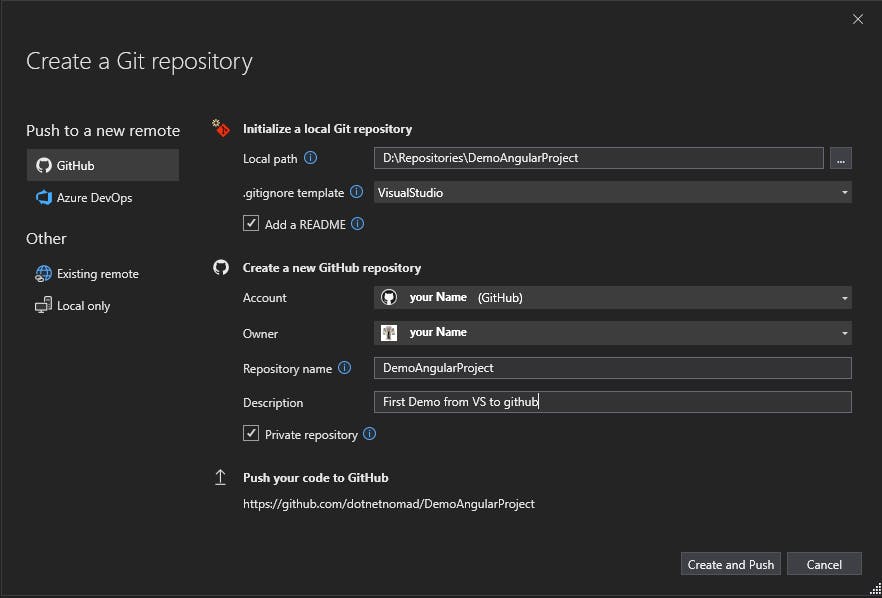
On the second dropdown select a .gitignore that suits your project type. For c# related projects you can choose the "Visual Studio" - gitignore.
Finally click on "create and push".
Typically this takes a moment and VS will inform you that it's pushing the repository to github in the background. You can see the current background tasks in the bottom left hand corner. There is this tiny speech-bubble, which you can click to show current background tasks.

As soon as the task completed successfully, head over to your github page and you'll find your linked repository there.

Congrats, you just set up your repository and pushed it to github via Visual Studio! And all of this without typing a single git command!
So for each future project you only have to follow step 5 again to create and link the repository to your github account.
In my next blogpost I will guide you through the main git commands and how the git integration takes care of them. Spoiler-alert: it's super easy... resulting in a incredible boost for your coding workflow!
How do you like the integration? Are you using it yourself? Maybe your using another IDE, do you have the same amenities provided?
Fell free to share it in the comments below.
Thanks for reading and stay tuned.